Lessons Learned: Onsite Scribing
It’s very easy to get into a pattern of how things are done, and I’ve found that especially applies to graphic facilitation. It’s easy to get spoiled by our six-foot-tall whiteboards everywhere…what happens if you need to give a “scribing experience” in a boardroom?
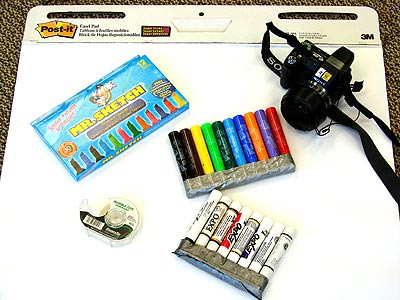
While I’ve used butcher paper in the past, I’ve settled on a pretty simple kit which I’ve now used twice over the past couple of weeks.

First thing is the 3M Post-it Easel Pads…these things are great, and stick to anything. They also don’t let the marker bleed through. I stick them up in a strip along the wall, so I can do a continuous scribe. A key point is to make the strip two layers deep. This helps, because a.) if, by some freak chance, the marker does bleed through, you haven’t messed up the client’s walls, and b.) if there ends up being a lot of content, you can move the first layer down, and you already have a fresh layer set up and ready.
Second thing is to tape together a pack of Mr. Sketch markers to make a palette. Mr. Sketch are awesome because a.) they have a good range of basic colors, b.) they last WAAAY longer than other markers without drying out, and c.) they smell good.
Tape never hurts. You never know!
And bring a camera! Clients love the instant “deliverable” of keeping the finished scribing, so being able to do a quick capture so you have an electronic copy is key.
And finally, brink a palette of Expo markers and a wipe…because you’d look kind of stupid setting up your 3M charts if they have giant whiteboards everywhere!
What’s in your onsite kit?


3 Responses to “Lessons Learned: Onsite Scribing”